Showing posts with label potato. Show all posts

Wednesday, January 29, 2014

Baked, Potato Rounds

I wasn't really sure what to call this recipe.  These are sort of a cross between a potato chip and a french fry. They are baked, they are potatoes, and they are round hence Baked Potato Rounds.  Apparently I am not feeling all that creative this morning but there you go.  But whatever it is called, my family loves this recipe!

You will need: 
3-4 medium potatoes
3 Tablespoons coconut oil
Salt

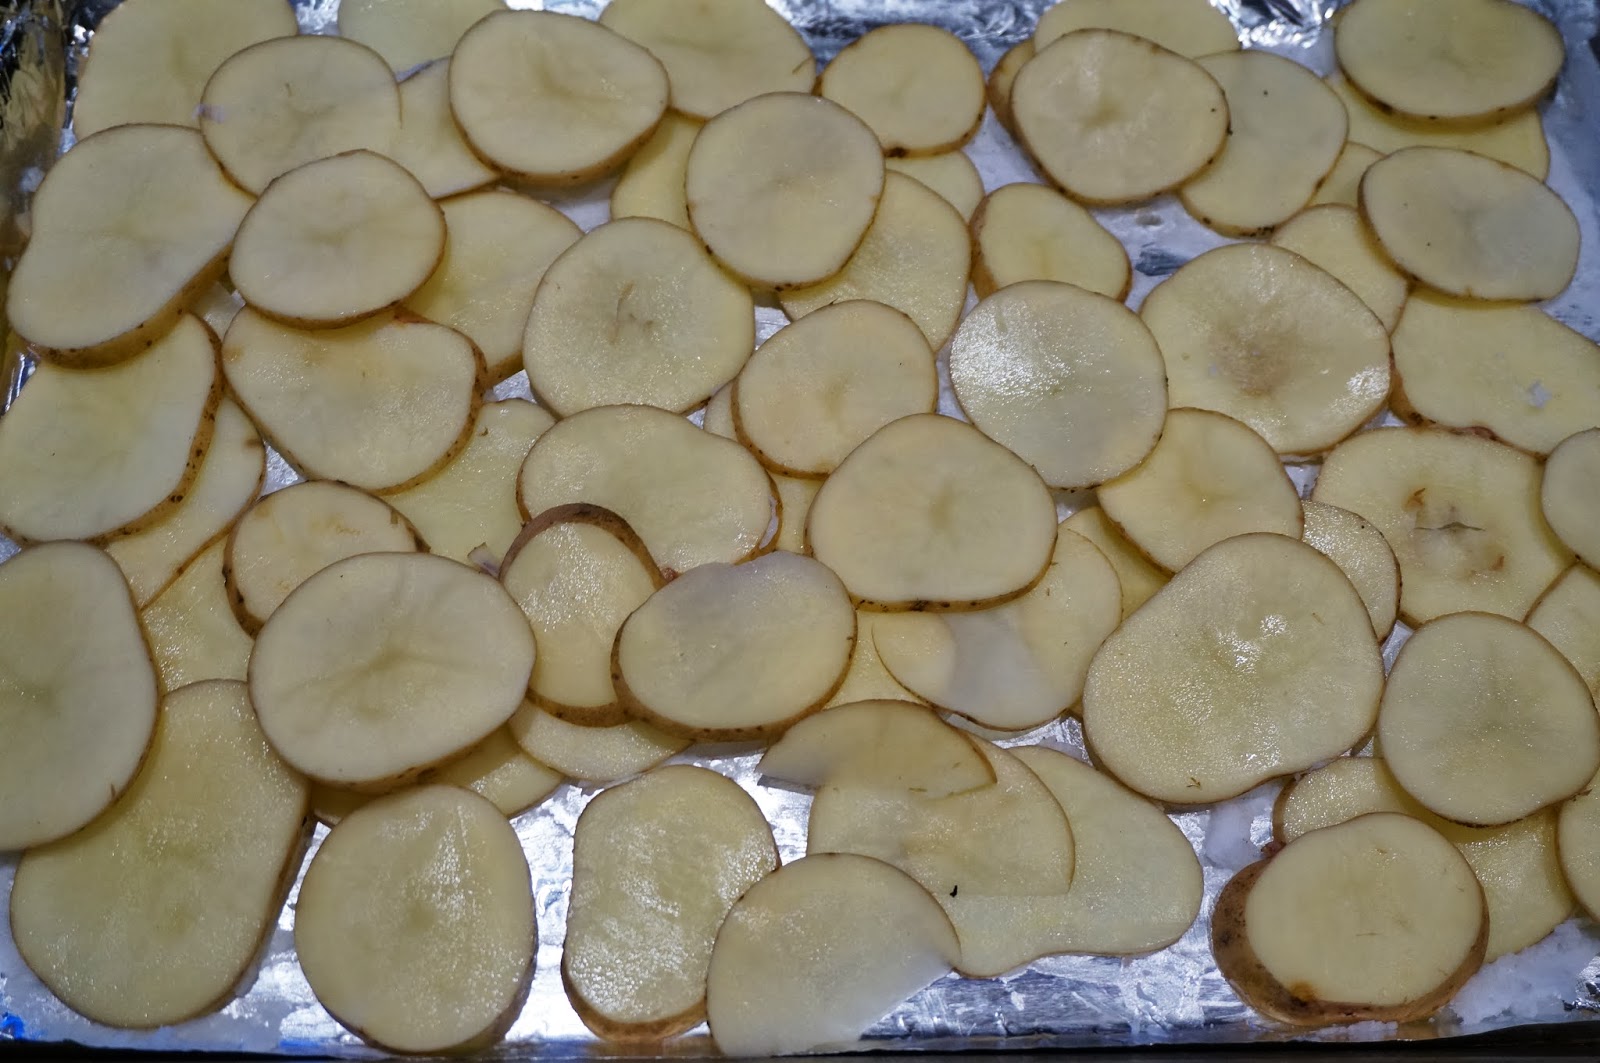
Preheat your oven to 400 degrees.  While it is heating scrub your potatoes and cut them into slices.  I used a knife but a mandolin is a great tool for this.  You can peel your potatoes if you want, I don't bother.  (Of course these are potatoes we grew in our own garden... I peel store bought potatoes).
Line a rimmed baking pan with foil.  Then coat the foil with the coconut oil.  With the coconut oil the potatoes both bake and "fry" in the pan.  I love coconut oil!  I may have mentioned that.
 Spread your coconut oil rubbed pan with the potato rounds.  Spread them out fairly evenly.
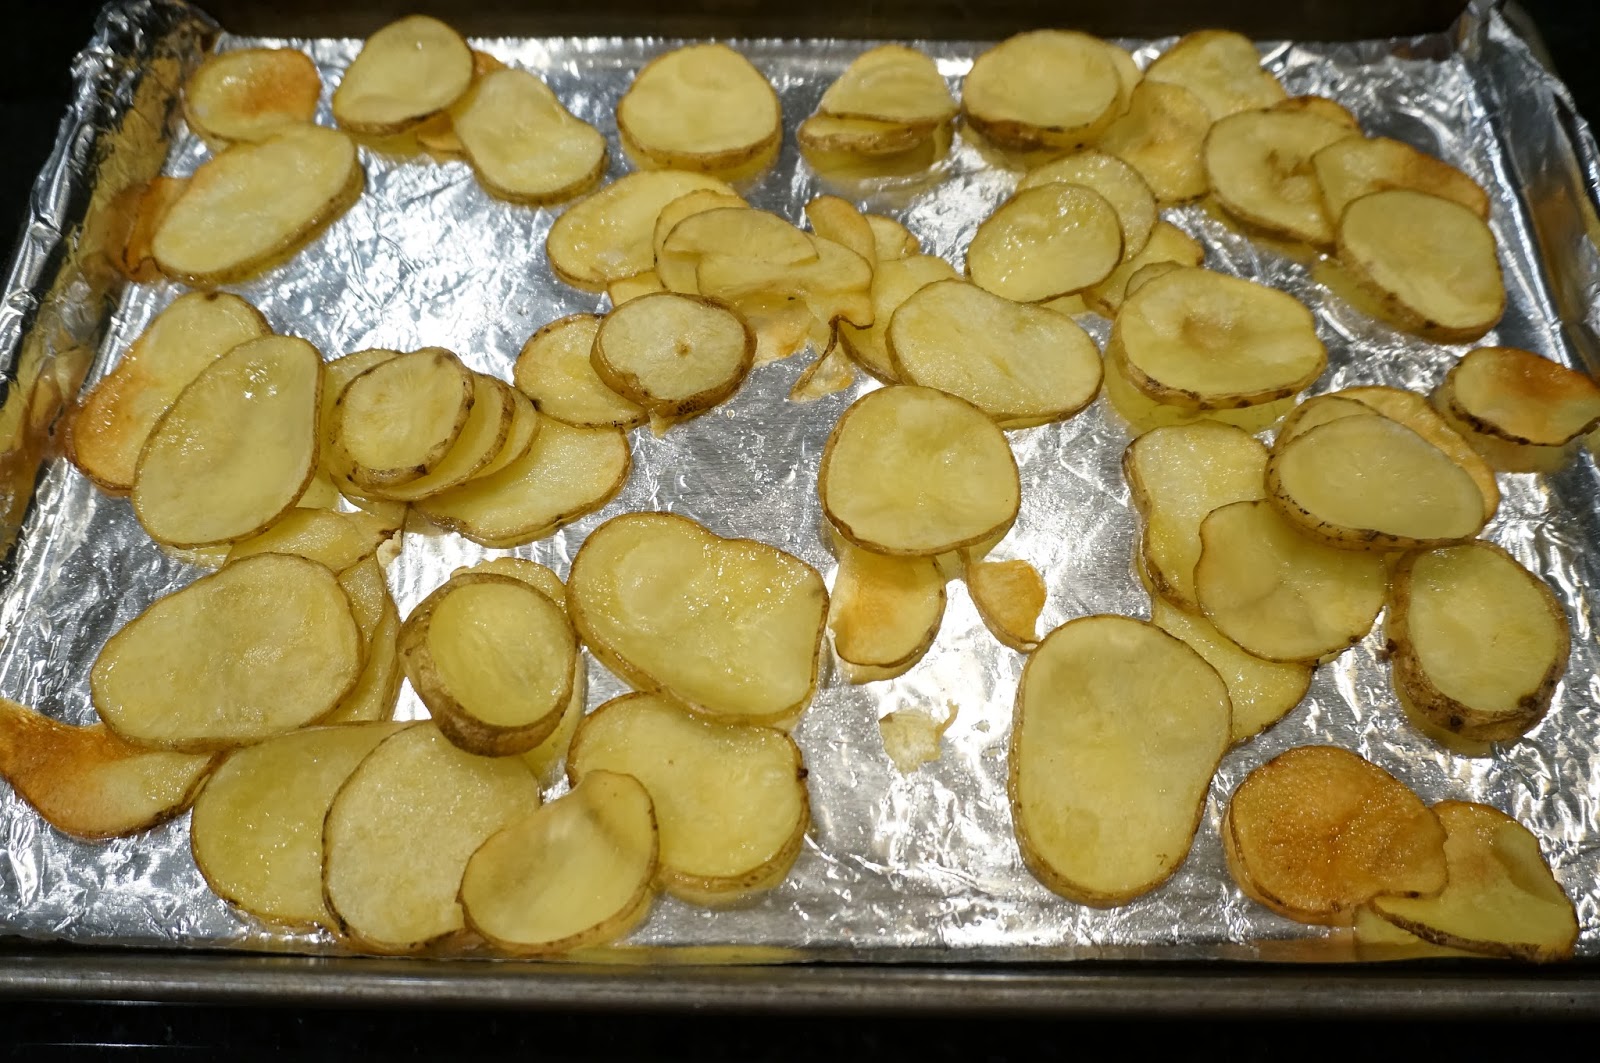
Salt to taste and pop them in the oven.  After about 20 minutes, flip the potatoes over with a spatula.  Don't be too concerned if you don't get them all flipped.  Cook another 20 minutes or so until they are the consistency you like.
We like them just starting to brown.  The darker brown ones around the edges of the pan in the above picture are crisp like potato chips (but if they are cut thick they are hard to bite into).  The rest of the potatoes are just starting to blister on top giving them a crisp outside and a soft fluffy center much like a french fry.

You can use this same technique for potatoes cut into fry shapes or wedges, they just take longer to cook which is why I like to use the potato rounds.

You can  follow me on FacebookPinterest,  Bloglovin, Google+ and Sverve.

Featured on:

Shared with:
DIY Sunday ShowcaseNifty Thrifty SundaySnickerdoodle SundayHappiness Is HomemadeBewitch Titi & MeThink Pink SundayInspiration MondayLink It or Lump ItAmaze Me Monday; Inspire Me MondayMMM Link UpMarvelous MondaysMore the Merrier MondayMonday FundaySunday BestPin It MondayMommy Monday Blog HopCOM Monday Link PartyClever Chicks Blog HopHomestead Barn HopInspire Me TuesdayTurn it Up TuesdayThe Scoop; In and Out of the Kitchen Link Party; Tasty TuesdayTurn it Up TuesdayThe ScoopDo Tell TuesdayShow Me What You GotToo Cute TuesdayShare It Link PartyTuesdays With A TwistHit Me With Your Best ShotWinter Blues WednesdayWow Me WednesdayWonderful Wednesday Blog HopWake Up WednesdayYour Whims WednesdayWow Us WednesdayA Little Bird Told MeHomemaking Link Up; MaMade Blog HopInspire Me WednesdayThriving on Thursday;  Live Laugh LinkyCreate It ThursdayWildly Original Link PartyMade You LookCatch a Glimpse ThursdayThursday Favorite ThingsPin it PartyHomeacre HopFrugal Days, Sustainable Ways; Let's Get Real Link PartyCraft Frenzy FridayLinkn BlogsSorry, Not SorryFriday PinfestFriday Link PartyPin It Thursday; Real Food FridayFriday Flash Blog HopTickled Pink Times TwoFrom the Farm Blog HopFarmgirl FridaySerenity SaturdayPin It partyCraft, Create, InspireFour Season Blog Hop

Sunday, December 29, 2013

What To Do With Leftover Ham - 5 Recipes

For Christmas we baked a wonderful yummy ham.
(Picture from Honeybaked Ham... yummmmy!)
But since there is only three of us, and one is pint-sized, we have a lot of leftover ham.  Good thing I have a set of leftover ham recipes that go beyond the basic ham sandwich.  There are not a lot of pictures with this post so you will have to use your imagination a bit. I hope these recipes and ideas inspire you to use up the rest of your leftover ham!

Ham and Egg Scramble

This is another one of those use what you have on hand recipes. We had this for breakfast this morning but I didn't even think of taking pictures.  But it did inspire this post.  For my egg scramble I use:

1 cup chopped leftover ham
1/2 cup chopped mushrooms
1 chopped red bell pepper
1/4 cup mined onion
6 eggs
salt to taste
1 Tablespoon olive oil
1 Tablespoon butter

In a skillet add the olive oil and chopped veggies.  You do not have to use the vegetables listed above but can throw in any combination you happen to have on hand.  Once the veggies are softened, add the chopped ham and cook until the ham is warm.

While cooking, put the eggs and salt in a bowl and beat with a whisk or fork until well combined.  Move the veggies and ham to one half of the pan.  Add the butter to the now clear half of the pan.  Spread the melting butter around to coat that half of the pan.  Add the eggs to the clear, now butter coated half of the pan.  Use a spatula to continuously scramble eggs in the pan.  Once about half of the egg is cooked, combine the eggs and the veggie/ham mixture and continue to scramble another minute or two.  Do not over cook the egg. Transfer to a plates and serve immediately.  Scrambled eggs, contrary to every restaurant buffet, do not sit well.

Ham and Egg Bake


My egg bake recipe is here.  Instead of using sausage, use ham.  Super yummy!  This recipe does not need to have the hash brown crust.  It can be cooked directly in a greased pan instead.  

Ham and Potatoes Au Gratin

I made this the other night.  Again I wish I had thought to take pictures.  Blogging is going to drive me to capture pix of everything I cook, just in case.  Well my family seems to understand... or they are afraid and don't want to startle me in someway.

You will need:
6 cups water (boiling in a sauce pan)
1 teaspoon salt
4-5 medium sized potatoes, peeled
2 cups chopped ham
1 Tablespoon butter
1 cup cream
1 cup milk
2-3 cloves garlic, minced or 1/4 cup onion, minced
1 teaspoon salt (this is in addition to the salt listed above)
1-1/2 shredded cheese

Preheat the oven to 400 degrees.

Bring your 6 cups of water and 1 teaspoon of salt to a boil in a medium sauce pan.  While the water is heating, wash and peel the potatoes.  Slice the potatoes into 1/4 inch thick slices.  Then cut all the slices in half.  Once the water is boiling carefully add the potatoes to the boiling water (please wait until boiling). Reduce heat to a simmer to prevent bubbling over.  Gently boil potatoes about 10 minutes.  This will significantly cut down on the oven cooking time.  It drives me crazy that every Au Gratin potato recipe has a 50 to 60 minute cook time when it really is more like 1-3/4 hours to get the center potatoes truly soft and cooked through.

Drain the potatoes into a colander in the sink.  Let them sit a few minutes to really drain off the water.

While waiting, in a bowl whisk together the milk, cream, salt, and garlic or onion.  You can add pepper to this mix too if you like.

Butter the bottom of your baking pan.  Take about half of the potatoes and add them to the pan then layer with about half of the chopped ham.  On top of that add about half of the milk and cream mixture.  Then repeat with the remainder of the potatoes, chopped ham, and mix and cream mixture.

Put in the oven for 30 minutes, uncovered.  After 30 minutes, add the shredded cheese and cook another 20 minutes until browned and bubbly.  Let set about 5 minutes before serving.

Ham and Bean Soup

This is one of my favorites.  We make a big pot and freeze it into many meals for the long and way too cold winter. (Did I mention tomorrow our high is supposed to be -10?)

I mention this here as a place holder.  I will be making this later this week and will post the recipe specifically.  And will take pictures this time!

Update: This recipe has been posted.  Find it here.

Ham and Pasta Alfredo Bake (Also Known as Ham Mac and Cheese)

This is super simple recipe.  And again is one I throw together with what I have on hand. Generally you will need:

1 box of pasta, any shape will do
salt
4 Tablespoons butter
1 cup cream
1 cup milk
1/2 cup grated Parmesan cheese
2 cloves garlic, minced
1-1/2 cup shredded cheese (I like to use 1/2 Gruyere and 1/2 cheddar but any combination will work)
2 cups chopped ham

Preheat oven to 400 degrees.

Prepare pasta until cooked al dente (in other words until not quite done and still chewy).  Drain in a colander over the sink.  Let sit a few minutes to drain well. 

While pasta is cooking in a sauce pan melt butter then add garlic to cook 2 or 3 minutes.  Add milk and cream and whisk together then cook until just simmering.  Whisk in Parmesan cheese and remove from heat.

Grease a baking pan.  Add cooked pasta and ham then cover with cream sauce you made above.  Last top with the shredded cheese.  Bake 30 minutes until top is browned and the sauce is bubbly. Classic comfort food!

Happy eating.  Please follow me on FacebookPinterest, and Bloglovin.

Shared with:
Clever Chicks Blog Hop; Inspiration Monday; Amaze Me Monday; Shared With Marvelous Mondays; Motivation Monday; More the Merrier Monday; Craft O Manic Monday Link PartyThis Momma's Meandering Mondays; Great Party Food Block PartyInspire Me Tuesday; The ScoopTake a Look TuesdayPincentive Blog HopTuesdays with a TwistDo Tell Tuesday; Too Cute TuesdayShare It Link PartyHomemaking Link Up; Whatever Goes WednesdayInspire me WednesdayYour Whims Wednesday; Wow Me WednesdayCreate It Thursday; Fabulously Frugal Thursday; Pin It ThursdayThursday Favorite Things Blog Hop; Catch a glimpse ThursdayFrugal Days Sustainable Ways; Homeacre Hop; Grace at HomeSweet and Simple FridayThe Weekly CreativeCraft Frenzy FridayBlog Strut Owl Style; Friday Link Party; What to Do Weekends; Friday Food FrenzyFrom the Farm Blog HopFarm Girl FridaySerenity SaturdayTickled Pink Times Two; Snickerdoodle Sunday; January Savings Challenge; Meal Plan Monday

Saturday, December 21, 2013

Baked Hash Browns


As you may recall, we grown our own potatoes.  And when you grow and store a couple hundred pounds of potatoes, you need to eat them.  One of my favorite potato recipes is simple hash browns.
I have made hash browns in a number of different ways and have found baking them in the oven to be the absolutely best way to make them.

You will need:

1 to 1.5 pounds of  potatoes
1/4 cup onion, minced
Small amount of olive oil or cooking spray (see my cooking spray note below)
Salt and pepper to taste

Optional:
1/4 cup shredded cheese
1 tsp paprika or other seasoning

Preheat the oven to 375 degrees.

Wash, peel and shred the potatoes.  You can use a cheese grater or a mandolin.  You can also use pre-shredded, fresh or frozen, potatoes. However, look at the ingredients on that prepackaged shredded potato sometime.  Yuck! It is only an extra 10 minutes of  your day to shred your own potatoes.  Take the time and do it yourself.
Once shredded, squeeze the potatoes to drain off some of their liquid.  You can use a fine mesh strainer and push the potatoes down against the mesh.  You can also gather up the potato shreds a handful at a time in some paper towels and squeeze.  I like the paper towel method. A clean tea towel also works great and you just toss it in the wash rather than toss it in the trash when you are done.  Either way do it over the sink because there will be a lot of dripping.  The drier the potato the better they will crisp on the outside.  Wet potatoes steam while cooking giving you more of a baked potato texture which is fine but not what we are aiming for here.
In a bowl, mix the potatoes, minced onion, salt (and pepper which my daughter will not eat so I leave it out), and cheese if you are using it.  We love the cheese.  I used cheddar in these pictures.  Gruyere works great too.

I think the best method for cooking is to spread parchment paper on a cookie sheet.  Spray the parchment paper with a little oil.  You could also use a basting brush and brush a thin layer of oil on the parchment paper.  The oil helps the potatoes brown nicely.

Here is my cooking spray note.  Don't buy it.  It is a toxic mess.  Instead get a refillable oil spray bottle like my Mr. Mister Oil Sprayer (you can buy it on Amazon).  This little baby is awesome.  Fill it part way with olive oil then pump the top a few times to create pressure.  Take off the top and push down on the nozzle to spray the oil just like a can of Pam without the chemical mess needed to make that Pam can spray.
Scoop about 1/3 cup of the potato mixture onto the parchment paper at a time and form into little potato patties.  The space between the patties helps the potatoes cook faster.  It also makes turning them over to cook both sides easier.
Put the cookie sheet into the oven and cook for about 20 minutes.
After cooking for 20 minutes before being flipped
Flip each hash brown over, return to the oven and cook another 15 minutes or until done.  Your oven may take more or less time.  You want golden brown, but not burned, on both sides.
Remove the hash browns from the parchment paper and either serve right away or put on a rack to cool.
These hash browns freeze great!  Once cool, put a piece of wax paper between the hash browns and store in a ziptop bag in the freezer.  You can warm them up in an oven or on the stove top.  Yes, you can use the microwave too, but try not to when you can avoid it.  The microwave destroys nutrients in the food.  And food should be about both nutrition and enjoyment.

Don't forget to follow me on Facebook and Pinterest.

Most viewed on:


Featured on:
A Sweet FragranceGrab button for Tasty Tuesday at Craft Dictator

Shared with:
Inspiration MondayClever Chicks Blog HopMarvelous MondaysCraft-O-Maniac Monday Link UpThis Momma's Meandering MondayThe ScoopFrom The Farm Blog HopPin It MondayDo Tell TuesdayTuesdays with a Twisthare It Link PartyTasty Tuesday;  Wonderful WednesdayCreate It ThursdayShow Off Your Stuff PartyBlog Strut Owl StyleCraft Frenzy FridayTickled PinkFriday Food Frenzy; Pin It Link PartyShow Off Weekend PartySnickerdoodle Sunday; Let's Get Real Blog HopIn and Out of the Kitchen Link Party

Sunday, September 1, 2013

Harvesting Potatoes

So it came time to harvest our potatoes.  The vines had started to die back a bit before we left for vacation but when we got back a week later the vines had all died out.  The picture below shows a mess of dead potato vines against a background of lemon balm. 
Dead potato vines
You may remember those same vines looking so healthy and happy here and here.  It is almost sad to see plants in the garden end their life cycle.  Almost.  But in this case, the dead vines mean yummy potatoes!  I cannot say how long for sure, but the vines had completely died back at least a full week before we began to dig up the tubers.  Which is a good thing.  It gives the potatoes time to develop a thicker skin which will help them store longer.
In order to dig up potatoes without damaging them it is helpful to have a big six tonged garden fork. The one pictured below is for hay but works great to get down below the potatoes and pop them out without stabbing them.
Our potato, compost, hay, et. al. fork
We planted 5 pounds of Yukon Gold and 5 pounds of Norland Red.  Our 10 pound planting resulted in a 100 pound return, pretty much 50 pounds of each (ok there were 3.2 pounds more of the Norland Red).
Yukon Gold

Norland Red
After harvesting we washed them off.  Now don't take that as gardening advice, because most experts recommend not washing them, but I just can't stand not to.  Washing gave me a chance to take a real good look at the potatoes to sort through those damaged during harvest to be used first, those with varmint marks and other issues to be thrown away, and those to go into storage until needed.  I am not sure what kind of varmint we had in the potatoes but a handful of them had gnawed areas showing a pair of long sharp teeth.  They were probably voles but could have been mice.

The potatoes for storage were placed in shallow cardboard boxes.  I made a double layer of potatoes in the bottom of each box, with the top layer being rather sparse for good air circulation.  The fille cardboard boxes were stored in the guest bedroom closet, which is a space completely underground, making it cool year round and it is so rarely used that it gets very little light.  Potatoes need to be stored in the dark.

Don't forget to follow me on Facebook and Pinterest.

Shared with:
Creative Home and Garden Hop; Clever Chicks Blog HopMore the Merrier MondayOn Display MondayInspire Me TuesdayTuesdays with a TwistTutorial TuesdaysWow Us WednesdayRaising HomemakersWildcrafting WednesdayFrugal Days, Sustainable WaysHome and Garden ThursdayThe HomeAcre HopWordless Wednesday;
From the Farm Blog HopThe Blog Strut Peacock StylePeek Into My ParadiseFarmgirl Friday Blog Hop

Tuesday, June 18, 2013

Randomness

Since things have been rather slow outside given our extremely late start of the season, here are some random pictures from around our suburban homestead.

I thought I should start with pictures of some of the cats on our homestead.  This first one is Widgy Cat, my pseudo name.  
Widgy Cat
Given that I have an ongoing law practice and have disclosed here that we are working on making a big move to another state to start a new business and homestead out in the country, it seems reasonable to keep a certain amount of anonymity for now.
Chatty
Sparks

Grapevines are starting to bloom
Peppers!
Finally Tomatoes!
We hilled our potatoes with compost this weekend. 


Wednesday, May 29, 2013

Around the garden

It has been cold and wet for weeks now.  But at least is hasn't snowed in a while.  The garden is growing slowly but there are a few plants that seem to be enjoying this weather.

Potatoes going strong
These are my Norland Red potato plants.  They are big, strong and healthy in spite of the cool soil temperature. 

Tiny Green Bean Bed

This is my green bean bed.  We had so many green beans last year that I cut way back.  The two plants in the back are climbers and the two in the front are bush beans.  The large green clump in the front left is one of my many chives.

Onion sets

Here is an onion bed which is just to the left of the green bean bed.  While it is hard to see in this picture, they are all planted in nice straight rows.  My hubby planted them this year.  When I plant them, they come up in unruly clumps.
Telephone Pole Peas

Growing at the base of the net trellis are telephone pole peas.  This is an heirloom variety of climbing pea that we first tried last year.  To be honest, we have not had the most luck with heirloom varieties.  Some of that may be our inhospitable climate and some of that is because for many heirlooms, there is just not enough information about the requirements of the plants so we have to do our best and guess. 

These peas were a heavy producer.  Much heavier than I was expecting.  My daughter would run outdoors and pick peas by the handful, eating them pod and all!  I am so glad she loves veggies.

We saved lots of telephone pole pea seeds last year, simply letting the pods dry on the vine.  When we cleaned out the peas at the end of the season I shelled all the dried peas and stored them in a paper bag (which I remembered to label... an ongoing theme for me).  The saved seeds were sown thickly and are doing well.

Behind the peas are the catnip plants.  With this many cats we need catnip, it just wouldn't be right otherwise.  To the right of the peas is the lower strawberry patch.

The soil to the left of the peas is actually full of corn.  The corn is about 2 inches tall and can't even be seen in the picture.  At this rate we may have corn for Halloween!
Related Posts Plugin for WordPress, Blogger...