Showing posts with label Christmas. Show all posts

Monday, December 23, 2013

Elf Yourself

Christmas break, officially day one toady, 9am, and my daughter is climbing the walls.  Seriously?!? This is going to be a long two weeks.
This calls for emergency crafting.  She wanted to make a flamingo craft.  Really?  Maybe later in the week.

I wanted to make her into an elf.  I think she thought I was going to dress her up in an elf costume.  She ran away when I suggested it.  And after I described what I meant, she still said "no!".

But I pressed on anyway, bringing the child along whether she wanted to or not, because I am the mom and I said so. Did I mention this is going to be a long two weeks.

This craft takes some colored paper and a large print out of your elf's face along with tape or staples and maybe some glue.  We also used cotton balls and ribbon but you could use paint, markers, stickers, or anything else you have on hand.
I let my daughter pick the colors for the dress, hat, shoes, arms and legs.  She also got to pick out how to decorate the dress.
I free hand drew the shapes for the various parts and she cut them out.  Then we taped, stapled, and glued the elf together.

I think this might be fun to do as a surprise for my husband.  When he goes out to run errands today I may make him into an elf and hang him on the wall next to our little one.  Not sure if I will elf myself too... but I might.
With the light reflection on the wall she looks like she is standing in snow... or surfing maybe.
 Please follow me on Facebook, Pinterest, and Bloglovin.

Most viewed post on:
Wonderful Wednesday Blog Hop


Shared with:
All Things Christmas; Inspire Me Tuesday; The Scoop; Take a Look Tuesday; Turn It Up Tuesday; From The Farm Blog Hop; Pin It Monday; Do Tell Tuesday; Tuesdays with a Twist; Share It Link Party; Your Whims Wednesday; Winter Blues Wednesday; Wildly Original Link Party; Wonderful Wednesday; Create It Thursday; Show Off Your Stuff Party; Blog Strut Owl Style; Craft Frenzy Friday; Tickled Pink; What to Do Weekends; Frugal Days, Sustainable Ways; Show Off Weekend Party; Snickerdoodle SundayInspiration Monday; Clever Chicks Blog HopAmaze Me Monday; We Made That

Christmas Cookies - The First Round

My first round of cookies are done.  I posted the recipe for the three ingredient peanut butter cookies earlier.
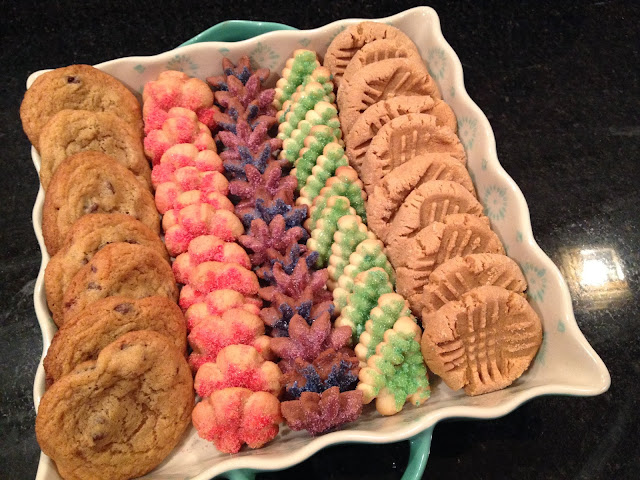
In this first round of cookies I made, in addition to the peanut butter cookies, chocolate chip cookies (because they are my husband's favorite), vanilla butter cookies, chocolate spritz cookies, and cinnamon sugar cookies.  These last three are made with a cookie press.

And this is when that homemade colored sugar came in handy.
I brushed the sugar coated cookies with some warm light corn syrup then rubbed the cookie, sticky side down, in the colored sugar.  The tray above I will be taking to a Christmas party.
 The tiered tray sits out o the kitchen counter inviting holiday snacking.
 I also filled up ten little boxes with a dozen cookies each to give away as needed.  People are always stopping by this time of year.  It is nice to have an impromptu gift to give.  Tomorrow might be round two of cookie madness.

Don't forget to follow me on Facebook and Pinterest.

Shared with:
All Things ChristmasThe ScoopTurn It Up Tuesday; From The Farm Blog HopPin It MondayDo Tell Tuesdayhare It Link PartyCraft Frenzy FridayTickled PinkWhat to Do WeekendsShow Off Weekend PartySnickerdoodle Sunday
Tuesday, December 17, 2013

Our Elf on the Shelf

This is our first year with the Elf.  Things have been interesting.  My daughter is of course delighted.  My husband... well he isn't exactly amused.  Here are a couple of pictures of what our Elf has been up to.
He build a Lego fortress and locked himself inside.  The Lego people looked concerned, or maybe they were paying homage.  I never can tell.
Last night he took a popcorn bath in the bathroom sink.  I guess he though mini-marshmallows would be too sticky.

He also wrapped the small Christmas tree in my daughter's room with toilet paper, rolled down the stair inside a roll of toilet paper, and took over the doll bed, making the poor dollies sleep on the floor. I hope your elf is behaving!  Don't forget to follow me on Facebook and Pinterest.

Shared with:
Showoff Weekend Blog Party; Serenity Saturday

Sunday, December 15, 2013

Reindeer Candy Cane

I needed an quick craft for our December Girl Scout meeting of Daisies. Here is what I came up with.

This is a free SVG cut file for die cut machines from SVGcuts.com which can be downloaded here. To save time with our 6 year olds, I pre-cut the paper pieces on my Silhouette.  If these were older girls with better scissors skills, we would have done a similar craft where they cut the paper out themselves.
The above picture shows you everything you need except the bottle of glue.  A glue stick is not strong enough.

The only real trick to this project is to make sure you do not glue between the two cut slits in the dark brown paper. The candy cane slides through these slits so do not put any glue here.
Glue the face to the brown paper, then glue on the nose and eyes.  You could draw the eyes on too.  We finished ours with a pre-tied wired bow.
 My daughter wanted hers to be a girl so we glued the bow to the ear.
Don't forget to follow me on Facebook and Pinterest. Happy crafting!

Featured on:
Back to the Basics

Shared with: All Things Christams; Ornament Link Party; Inspire Me Tuesday; The Scoop; Turn it Up Tuesdays; Do Tell Tuesday; Tuesday with a Twist; Pincentive Blog Hop; Share It Link Party; Too Cute Tuesday; From Dream to Reality; Fall Into Fall; Wonderful Wednesday; Tuesday To Do; A Little Bird Told Me; Wow Us Wednesday; Homemaking Link Up; Wow Me Wednesday; Your Whims Wednesday; Homemade by You; Whatever Goes Wednesday; Treasure Hunt Thursday; Home and Garden ThursdayWildly Original Link Party; Live Laugh Linky; Pin It Thursday; Sock it To Me Thursday; Catch a Glimpse Party; Sweet and Simple Fridays; Homeacre Hop; Grace At Home; Create It ThursdayBlog Strut Owl Style; Tickled Pink Two Times; Friday Link Party; Craft Frenzy Friday; What to Do Weekends; From the Farm Blog HopFriday Food Frenzy; Merriest Blog HopFarm Girl Friday; Block Party

Tuesday, December 10, 2013

Victorian Cone Ornament

I wanted to make something beautiful to "wrap" my coconut oil bath fizzies that I showed you last week here.
Isn't this ornament beautiful!
I cut this out on my Silhouette but I think you could download the files and make
templates to cut by hand as well.  You can download the pattern for free here from svgcuts.com
The pattern is way off to the right for some reason so it won't show when you open the file (it opens as a 
webpage); just scroll over then copy and paste it into something like a Word document for printing.  
I used coordinating Christmas papers for the sides of the cone.  Then embellished it and added cording.
 
 Once I popped in a set of my bath fizzies the gift of homemade ornament and 
homemade bath fizzies is ready to go. Actually I also made a gift tag from coordinating 
paper and strung it on the cording as well (not pictured).
I will wrap the ornament and bath fizzies in several sheets of tissue paper then gently box it up.

Don't forget to follow me on Facebook and Pinterest.

Featured on:

Shared with:

Saturday, December 7, 2013

Box of Chocolates

I wanted to send my sister and niece some chocolates, among other things, for Christmas.  I found this really beautiful box of chocolates with matching embossed fabric bag at Costco.  I know nothing of the chocolates inside, but I was really taken by the packaging.  
Before I send the chocolates, I wanted to make a personalized tag.  And since it is chocolate, I decided to use one of my favorite phrases, "Chocolate doesn't ask stupid questions. Chocolate understands."  This phrase can equally be applied to a glass of wine but I digress. 
 I cut out a scrolled frame on my Silhouette from Bird's Cards. Then I printed the phrase using registration marks on a complimentary colored paper.
On the back I cut out a complementary frame on which I printed a Christmas greeting. Once the three papers were glued together I strung them from the handle on the bag.
I am not sure my sister or niece will find this amusing (or even recognize that the card is pretty unique).  But be that as it may, it made me happy.  Now for the rest of the family.

Don't forget to follow me on Facebook and Pinterest.

Christmas Tree and Fireplace


This year we are working with a 9 foot tree.  And this year I am having trouble taking a picture of it because it is so tall.  I wish we had a grand entry in which to showcase our tree.  But the rest of the year I am glad we have a cozy Craftsman style home instead.  So the enormous tree has been relegated to a corner in the living room.  Which is probably best because if I had to decorate the back of the tree thoroughly, I would have to buy more ornaments!
Do you like my new tree skirt?  When we pulled out all the Christmas items this year I had grown tired of the old tree skirt I made years ago.  This year I made a simple tree skirt quilt in a deco or arts-and-crafts theme.  When I look at the skirt in isolation I don't really like it.  But with the tree, I think it works.


Here is our living room fireplace sporting three of the seven paper garlands I made this year that you can see here and here.

The wall hanging is a quilted St. Nicholas in the forest vignette I made several years ago.
 

This year our daughter wanted "an elf" because everyone else in her kindergarten class had one.  It starts so young.  But this time I agreed it was time.  I found a plush elf as Costco who isn't nearly as freaky as the standard Elf on a Shelf.  According to the letter in his hand, his name is Taylor.  I think we may need to rename him.  I put him up yesterday and my daughter hasn't noticed him yet.  I wonder how long it will take.

Sunday, December 1, 2013

Christmas Garlands - Sweets and Stockings

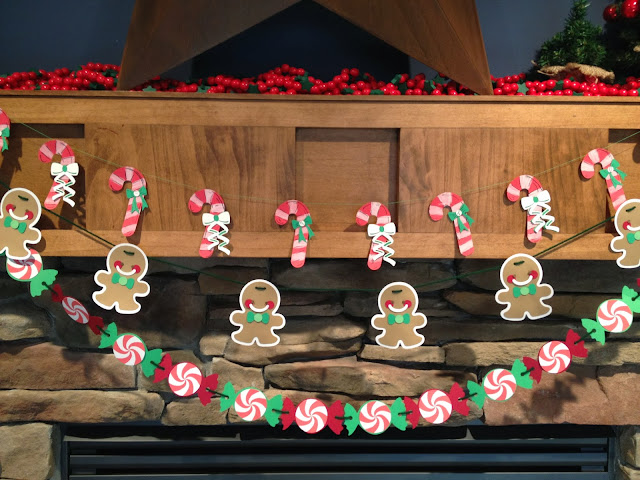
So I have developed a "thing" for paper garlands this year.  After I made the circle and tree garlands I made these extremely cute gingerbread men.
This is made from a free cut file I downloaded from svgcuts.com.  The gingerbread man svg cut file can be downloaded here.  All the shapes where cut from my Silhouette and glued together.  Once assembled, I punched two small holes in each little guy's forehead and thread them onto a piece of dark green yarn.  Then I taped the strand up on my fireplace.  Having threaded the gingerbread men I was able to move them around on the yarn once hung to space them (more or less) evenly.

It was going so well.  But once I got the little guys up on the fireplace and they looked so lonely.  They needed friends.  Or in other words; they were a good start but the large fireplace mantel needed more.
 
 So this is what I did. It makes me happy looking at it!
  
First I cut out some red candy canes.  Then I painted the white stripes on the candy canes with my daughter's craft paints.  Who needs fancy and expensive!  Next I added some black emphasis marks with a thin point sharpie.  The candy canes looked good but I wanted to add some green to the garland so I cut out some bows with my Silhouette from the bow files that came with my Silhouette.
Once the candy canes were completed I used a simple needle and sewing thread to string them together. Then taped them to the top of my fireplace mantel. 
The gingerbread mean and candy canes were looking good together but a third garland was needed to really complete the look.  And since I had stumbled into a Christmas sweets theme, I chose to add a strand of peppermint candies.  Ok maybe peppermint are not exactly Christmas, but the color and theme was correct. I downloaded the peppermint candy cut files for free from www.wecanbeaoriginal.com here.
So here is the finished fireplace in our lower level. 
But that got me looking over the fireplace upstairs with that lonely Christmas tree garland.  It too needed more.  This is an even bigger fire place! (You can tell from these pictures that we have since done the rest of the Christmas decorating).My first step was to cut out these super cute Christmas stockings using several different Christmas papers.  Then I again used a needle and thread to string them together. The stockings were the Silhouette Store's free shape of the week last week.
Working with the rule of threes I decided the third garland on this fireplace would be a sleigh and reindeer.  Aren't these just adorable?  The sleigh is a free Silhouette file I downloaded from www.birdcards.com here.  The reindeer cut file I downloaded from SVG Shop for free here. The bows are from the bow collection that came with my Silhouette. 
I made two sets of a sleigh with eight reindeer.  My daughter wanted the lead reindeer to be Rudolph. I should have made nine reindeer for each set but Rudolph was an after thought.  Perhaps Rudolph is filling in for Prancer or Comet. 
Here is the finished mantel. 
Now I need to start shopping! Don't forget to follow me on Facebook and Pinterest.

Shared with:
Related Posts Plugin for WordPress, Blogger...