Friday, July 5, 2013

Strawberry Jam


It's that time of year!  My strawberries are finally ready to go and only a month late.  But this is certainly a better-late-than-never situation.  My little one eats her weight in peanut butter and jelly through out the year (she might eat her daddy's weight too).  So I make lots of strawberry jam for her PB&Js.

The strawberries we grow ourselves in a lower and upper bed.  This year each bed is producing well but the lower bed is out pacing the upper bed.  I tried making Strawberry Rocks this year to help cut down on the chipmunk nibbling. Click here to see my strawberry rock post. And it actually worked!  There still is some nibbling but nothing like the damage done last year.  So I heartily recommend the strawberry rock approach.
The first step in making strawberry jam is to acquire strawberries.  I love growing my own.  I know who has touched them, what has (or has not) been applied to them, and where they have been.  Essentially I know each strawberries' whole life story.  I like that.

Whether you grow your own, pick your own, buy store bought fresh or frozen, you are going to need between 10 to 12 cups of washed strawberries. 
Washed and ready to can
The next step is to hull the strawberries.  If you bought frozen strawberries, yours are already hulled and just need to defrost a bit. 

For fresh strawberries you need to remove the stem and inner core.  You can buy a fancy strawberry huller gadget, or use a pairing knife, but I just use my thumbnail.  I dig into the top of the strawberry with my thumbnail and gouge out the stem and core; not pretty but very effective. I also remove any bad spots that I do not want to make it into my jam.
Half way hulled
After the whole batch is hulled, the strawberries need to be crushed.  I just use a potato masher.  But you could just squish them with your hands (properly clean hands that is).
Ready to crush (or mash)

Crushing the strawberries with a potato masher


You want to end up with about 8 cups crushed hulled strawberries.  You do not need to obliterate the strawberries in this step.  They will do that themselves in the cooking process.

Next put your strawberries in a non-reactive pan.  Strawberries are rather acidic so you don't want to introduce odd flavors into the jam by making an unfortunate pan choice.  Into the pan with the 8 cups of crushed strawberries add 6 cups of sugar.  Remember we are essentially making a dessert here.  Stir it all together and you will get a mixture that looks like this.


Now put the pan on medium heat and let it cook without a lid.  You want to stir often.  Oh and do not walk away for very long .  The strawberries will boil up on you like a covered pan of pasta if you are not watching.

If you noticed, I did not act pectin to my jam.  You can add pectin to make the jam set faster and have a thicker consistency.  Instead I add a lot of slightly underripe strawberries which have a higher pectin concentration than the fully ripe strawberries (the recipes I have seen recommend using about 1/3 underripe strawberries).  I had to cook my strawberries for about an hour and a half to get them to gel stage. 
Cooked to gel stage
From the good folks at Ball jars there are three tests you can perform to ensure your strawberry jam made without the use of commercial pectin has reached the gel stage (these are their words, not mine... credit where credit is due).
1. Temperature Test Cook the soft spread until it reaches a temperature of 220°F, or 8°F above the boiling point of water. Measure the temperature of soft spreads with a candy or jelly thermometer. Always insert the thermometer vertically into the soft spread and ensure that it does not contact the surface of the pot.
2. Sheet Test Dip a cold metal spoon into the boiling soft spread. Lift the spoon and hold it horizontally with edge down so that the syrup runs off the edge. As the mixture cooks, the drops will become heavier and will drop off the spoon separately but two at a time. When the two drops join together and “sheet” off the spoon, the gel stage haven reached.
3. Refrigerator Test Chill two or three small saucers in the freezer. Place a teaspoonful of soft spread on the chilled saucer and place in the freezer for 1 minute. Remove the saucer from the freezer and push the edge of the spread with your finger. A mixture that has reached the gel stage will be set, and the surface will wrinkle when the edge is pushed. Note: To prevent overcooking or scorching, remove the soft spread from the heat before performing this test.
If the test you performed shows that the gel stage has not been reached, return the mixture to the heat to cook for a few minutes longer, then retest the soft spread.

Once your jam has reached the gel stage you are ready to store the jam.  I choose to can my jam for long term storage (at least a year).  Excellent instructions for beginning canning can again be found here again from the good folks at Ball.  I will not turn this post into a full canning tutorial.  If you have never canned before, it is easy but must be done correctly or someone can die.  (Was that dramatic enough to make the point?)

First I sterilized my jars.  I did that by running them through the dishwasher while the strawberry jam was cooking down.  I took the hot jars from my dishwasher to be filled one at a time as needed.  More traditionally you boil the jars in your canner while the jam is cooking.  The key here is the jars need to be clean and very hot.

While the jam is cooking and the jars are heating I put the lids into a small pan to scald.  Scalding is basically heating the lids up so that the seal (that orange band around the edge) gets soft in preparation for sticking to the top of the glass jars.  Do not boil the lids, just simmer them a bit.
Lids scaled and ready to go

First jar filled
Each jar is filled with the jam leaving one quarter inch head space. Head space is the space between the top of the jam and the top of the jar.  You want the head space for the jam to expand while being processed. 
Lid goes on

Before the lids go on the jar, you need to wipe the rim of the jar clean to make sure there is no jam coming between the lid and the jar which can cause the seal to fail.  The lids are hot so I just this handy dandy little plastic wand with a magnet at the end called cleverly enough a lid lifter to take the hot lids out of the hot water and place them on the jar. Once the lids are in place I add the screw band just finger tight.  Do try to crush the lid on with the band that will cause the seal between the lid and the jar to fail.
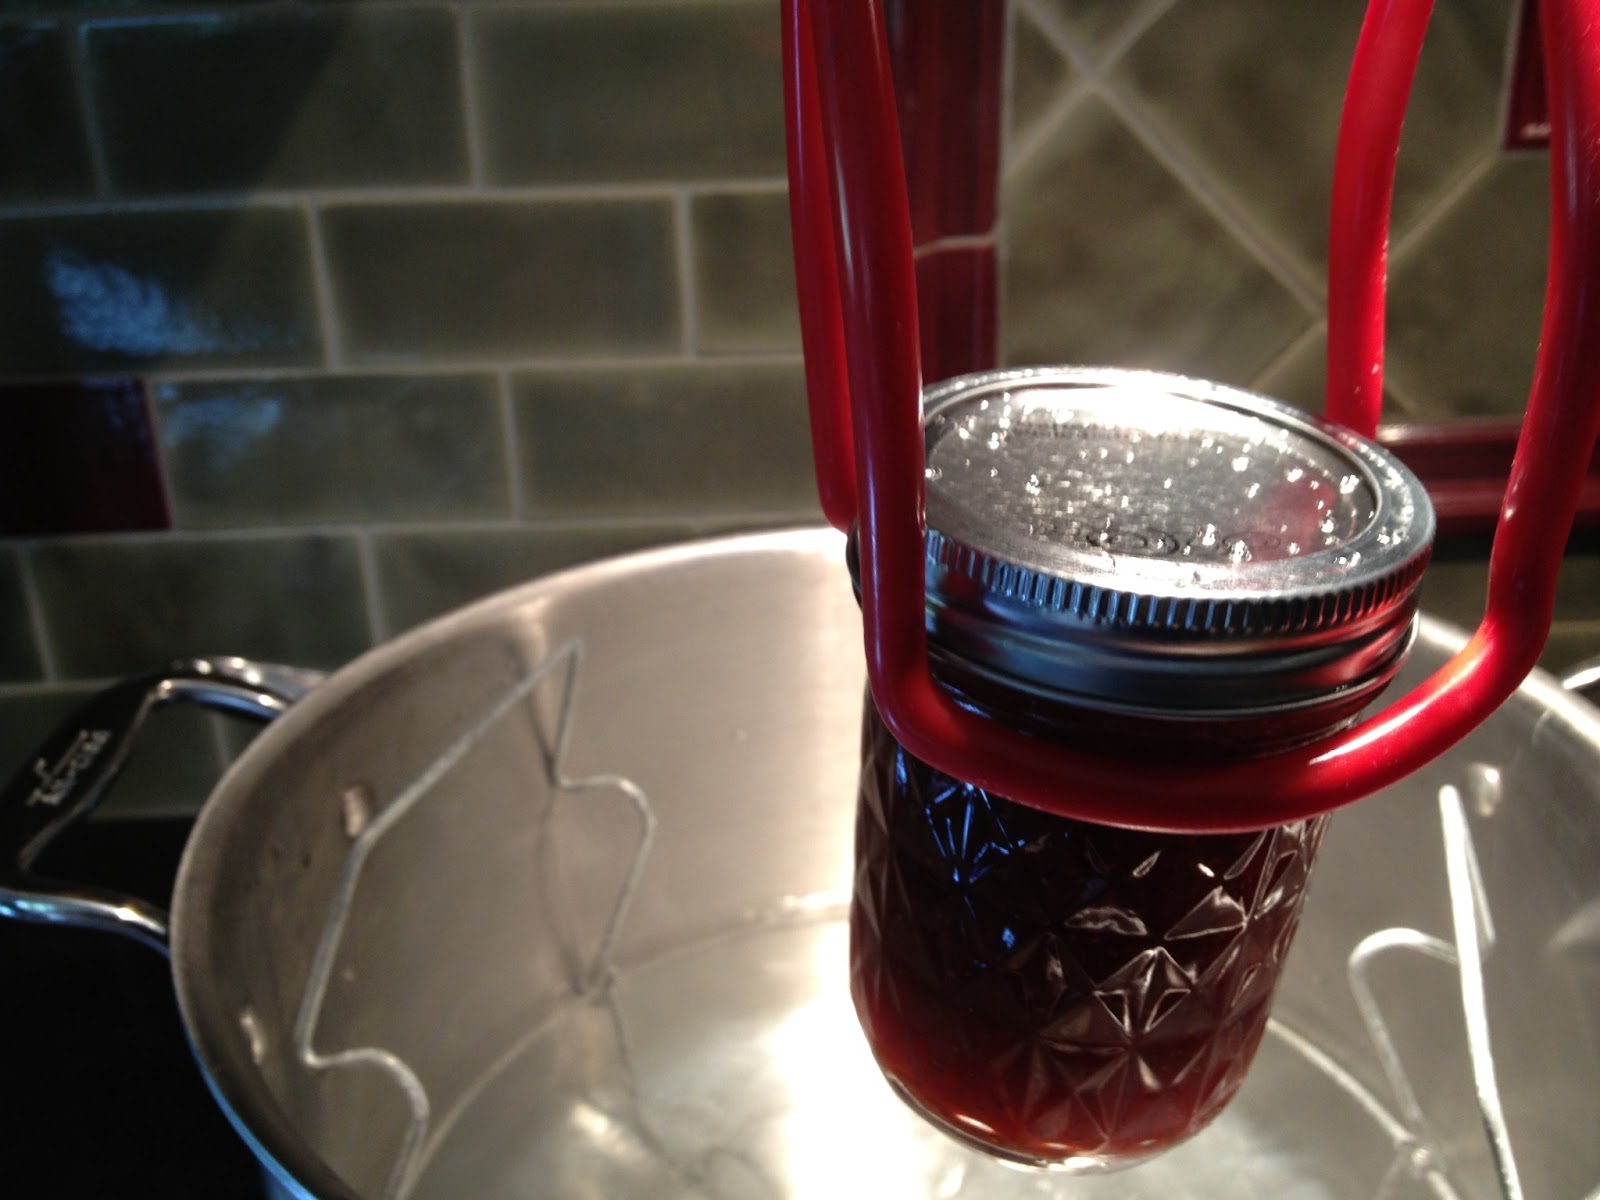
Into the boiling water bath canner
Once all sealed up, I use my handy dandy jar lifter (another catchy name) to put the jars into the boiling water canner.  The canner is just a big pot big enough to fit my canning rack.  I use a canning rack to keep the jars from sitting on the bottom of the pan.   
Jars ready to process
Once all the jars in are place, make sure there is about an inch of water over the top of the jars.  Put a lid on the canner and turn up the heat to get a vigorous boil.  Once boiling, set a timer for ten minutes.  Leave the lid on an wait.  Don't mess with the heat, just let it boil like crazy.

After ten minutes is over, remove the lid, turn off the heat and set the timer for another five minutes.  When the five minutes is over, remove the jars with the can lifter.  Do not tip the jars or even dry them off.  Just set them on a towel or a trivet in a corner of your kitchen where they will not be disturbed.  Cover the jars with a towel to keep a draft off of them while they cool.  Leave them alone to cool over night (or at least 5 or 6 hours).  The jars will make a popping sound as they cool.  That is normal.  Once cooled, check to make sure each jar sealed properly.  The lid will be indented into the jar because a vacuum seal has been made.  You should be able to get the screw band off with your fingers but should not be able to pry off the lid with your fingers.  If you can get the lid off with your fingers, the jar did not seal properly and either needs to be reprocessed with a new lid, or it can just be put into the refrigerator and used.  After the jars are completely cooled, I write the date on the lid and put into storage for another day.


Strawberry jam is very easy to make even though it takes some time.  But the time is worth it!

Don't forget to follow me on Facebook and Pinterest.

Shared with:
Clever Chicks Blog Hop
Homestead Barn Hop
More the Merrier Monday
Sunny Simple Life
Tuesdays with a Twist
Wildcrafting Wednesdays
Wow Us Wednesdays
Frugally Sustainable
Home and Garden Thursday
Thursdays at the Homestead
Freedom Fridays
From the Farm Blog Hop
A Peek Into My Paradise


Wednesday, June 26, 2013

Chocolate Covered Pretzels

Warning.  What follows is not healthy.  It is addicting.  So you may want to turn back now.
My husband loves pretty much all things chocolate.  You just have to love a man like that.  So today I decided to make some chocolate covered pretzels. 

The first step was going to the store to buy a bag of pretzels.  Yes I could have made them.  No I didn't bother.  Sorry, I am not a purest.  Don't hold my lack of time and ambition against me please.

Next I took out my trusty double boiler.  You may remember it is larger than needed from my Homemade Lip Balm post.  I had some left over dipping chocolate from some long forgotten project but not quite enough.  So I threw the dipping chocolate and some chocolate chips into the double boiler.  I just eyeballed the amounts but I would guess that I used about a cup of each.  
Chocolate chips and dipping chocolate in a double boiler

I put my too large metal bowl over a pan of simmering water letting the chocolate melt.  I like to stir along the way because I feel like I am doing something.  Eventually I guess you really do need to stir.  Oh and make sure you do not get any water in the chocolate... not even a drop.  It only takes a few minutes to melt the chocolate.  Do not let the water boil and do not over cook the chocolate.  Don't ask why, just don't... trust me :)
Starting to Melt
Once the chocolate was all smooth and melted, I took my bowl off the pan and over to my work surface to start the rather messy coating process.   
Getting a Dip

Simple but messy... and worth it!
I used my handy spatula to push the pretzels into the melted chocolate and two wooden skewers to lift them back out.  Now I will tell you from past experience that dipping pretzel sticks or rods is MUCH simpler than dipping the knotted pretzel shape but this time I wanted to be adventurous.  Next time I will probably go back to the large pretzel rods, just saying.  Once the pretzel was coated with chocolate, I put the skewers through two different pretzel holes and gently shook the pretzel until the excess chocolate dripped back into the bowl.  Then I laid each pretzel on a sheet of parchment paper to dry and set.
Letting the chocolate set
As an added bonus I also dipped some mini-Oreo cookies too.  Those would be the odd round shapes in the pictures.
Can you say YUM!
You may also like this post on homemade Strawberry Jam or on my (almost) famous Dutch Oven Bread with only four ingredients. 

Don't forget to follow me on Facebook and Pinterest.

Shared with:


Tuesday, June 25, 2013

Dutch Oven Bread - Only Four Ingredients!

Dutch Oven Bread - So Simple!


I must admit that the first time I came upon this recipe I was skeptical.  Over the years I have learned to read through a recipe and get a feel for whether or not it is worth a try; meaning can I pull it off successfully and will my family eat it?

So when I found this recipe a couple of years ago I was dubious.  I have been baking my own bread (admittedly sporadically) for several years now and, though I know I still have lots to learn, I felt I had a pretty good handle on the basics of bread making.  And this recipe did not look like it had a chance to work.  But after stumbling upon it a few more times in various places I decided to throw caution to the wind and give it a try. 

It worked.  Beautifully.  It actually worked beautifully the first time.  And then I tried it again and it worked beautifully the second time too.  And the third.  And so on. 

This bread is crusty on the outside and chewy on the inside.  It makes a good serve-with-dinner bread or an even better serve-with-soup or stew bread. 

For ingredients you will need:

3 cups flour
1 3/4 teaspoon salt
1 1/2 cups of water
1/2 teaspoon yeast

For equipment you will  need:

One large bowl for the dough to rise in
One Dutch Oven
Plastic wrap for the top of the bowl
A big spoon.  One of those spoon-ulas (half spoon, half rubber bowl scraper spatula thingees) works best.
My Cast Iron Dutch Oven

Four simple ingredients!
Into the big bowl put all the ingredients in no particular order. 
Ingredients before mixing
Mix together with the big spoon.  The mixing takes less than a minute.  The mixture will be gooey and messy looking.
All Mixed Up
Cover bowl with plastic wrap and leave on counter overnight.  In other words, do not put this in the refrigerator. 
Ready to set on the counter all night
You want the dough to have 12 to 18 hours to just sit and rise. 
After sitting on counter about 14 hours
The next day after the dough has risen put the Dutch Oven into a cold oven and heat oven to 450 degrees.  After the oven is preheated, set the timer for 30 minutes and leave the Dutch Oven in your now heated oven.

While the Dutch Oven heats up, turn the dough out onto a heavily floured surface and with heavily floured hands shape into a ball.

Cover the dough with plastic wrap and let set covered on the counter for 30 minutes.

Remove Dutch Oven from the oven, remove the lid and carefully put dough into Dutch Oven, recover with lid and put Dutch Oven back into the 450 degree oven for 30 minutes.  Be careful! The Dutch oven is 450 degrees and so is the lid.
Ready to Cook
After 30 minutes remove the lid, briefly admire the bread you are baking, then put the now uncovered Dutch Oven back into the 450 degree oven for another 15 minutes. Remember these last 15 minutes are without the lid.
After 30 minutes with lid on
Remember to put the lid somewhere you won't bump into it.  My cast iron lid takes a very long time to cool down.

After the 15 minutes are up, remove the Dutch Oven from the oven, remove the bread from the Dutch Oven and allow to cool on a wire rack. 
All done! Ready to cool on wire rack.
Use pot holders to get the bread out so you don't burn yourself.  Now stand there and admire your work!  I know I always do.

So after I made this awesome bread it was time to cook dinner.  What could I do with a very hot Dutch Oven?  Apparently lots of things.  Scroll down to my next post to see The Dinner After.

Don't forget to follow me on Facebook and Pinterest.

I was Nominated!  Lookie-here!

Wildcrafting Wednesday People’s Choice Nominee

Shared with: Homestead Barn HopMore the Merrier MondayClever Chicks Blog HopTuesdays With A TwistWildcrafting WednesdayWow Us WednesdayFrom the Farm Blog HopThursdays at the HomesteadFreedom FridaysHome and Garden ThursdayFrugal Days, Sustainable WaysA Peek into my ParadiseInspire Me TuesdayTutorial TuesdayBarns and Noodles - Creativity Linky PartyImparting GraceMeal Plan Monday; Snickerdoodle Sunday; Tasty Tuesday

Tuesday, June 18, 2013

Randomness

Since things have been rather slow outside given our extremely late start of the season, here are some random pictures from around our suburban homestead.

I thought I should start with pictures of some of the cats on our homestead.  This first one is Widgy Cat, my pseudo name.  
Widgy Cat
Given that I have an ongoing law practice and have disclosed here that we are working on making a big move to another state to start a new business and homestead out in the country, it seems reasonable to keep a certain amount of anonymity for now.
Chatty
Sparks

Grapevines are starting to bloom
Peppers!
Finally Tomatoes!
We hilled our potatoes with compost this weekend. 


Thursday, June 13, 2013

The Dinner After

At the end of my post about my Dutch Oven Bread I mused about what I could make for dinner with a pre-heated Dutch Oven in my grasp.  Well on my counter.  It really was too hot to grasp.

I had a whole chicken in my refrigerator awaiting a cooking date so suddendly the light bulb went off in my head.  Why not cook the chicken in the Dutch Oven.  Duh.  I really hadn't planned this so I was feeling very clever.

To start I put some butter into the Dutch Oven.
See it really was hot in these pictures
Then I sliced up some onions and layered them on the bottom of the Dutch Oven.  This helps insure the chicken does not stick to the pan.  My Dutch Oven is well seasoned so the chicken should not stick but I like the flavor the onions bring to the meal... we ate the onions too!

I also added some chicken stock to the pot.  This will add some moisture to the cooking environment to help keep the chicken from drying out.  Again, when cooking in a lided environment, drying out is not a big problem.  And again, I like the flavor the stock adds.  My chicken stock happened to be frozen.  When I have the remains of a whole chicken left over, I boil it down for stock.  (Which will be the ultimate end for this chicken). Then when the stock is cooled and strained, I freeze the stock in ice cube trays.  The frozen stock cubes are then sealed up in ziptop bags in the freezer for future use.  This makes it much easier to use the stock in multiple recipes.  Someday I should actually measure how much stock is in one cube so I know how many cubes to the cup but that is a project for another day.
Add onions and frozen chicken stock (frozen is not required)

The chicken was carefully placed on top of the onions.  I say carefully because remember the Dutch Oven is still close to 400 degrees in these pictures.  I sprinkled the chicken with salt, thyme, sage, and basil.  A pinch or two of each.  Season to your own liking.  
Add whole chicken and season
The lid was put on the Dutch Oven and the whole thing put into a 425 degree oven for about an hour and a half.  The chicken was falling off the bones and very moist and tender.
Not the best picture but it sure was yummy!
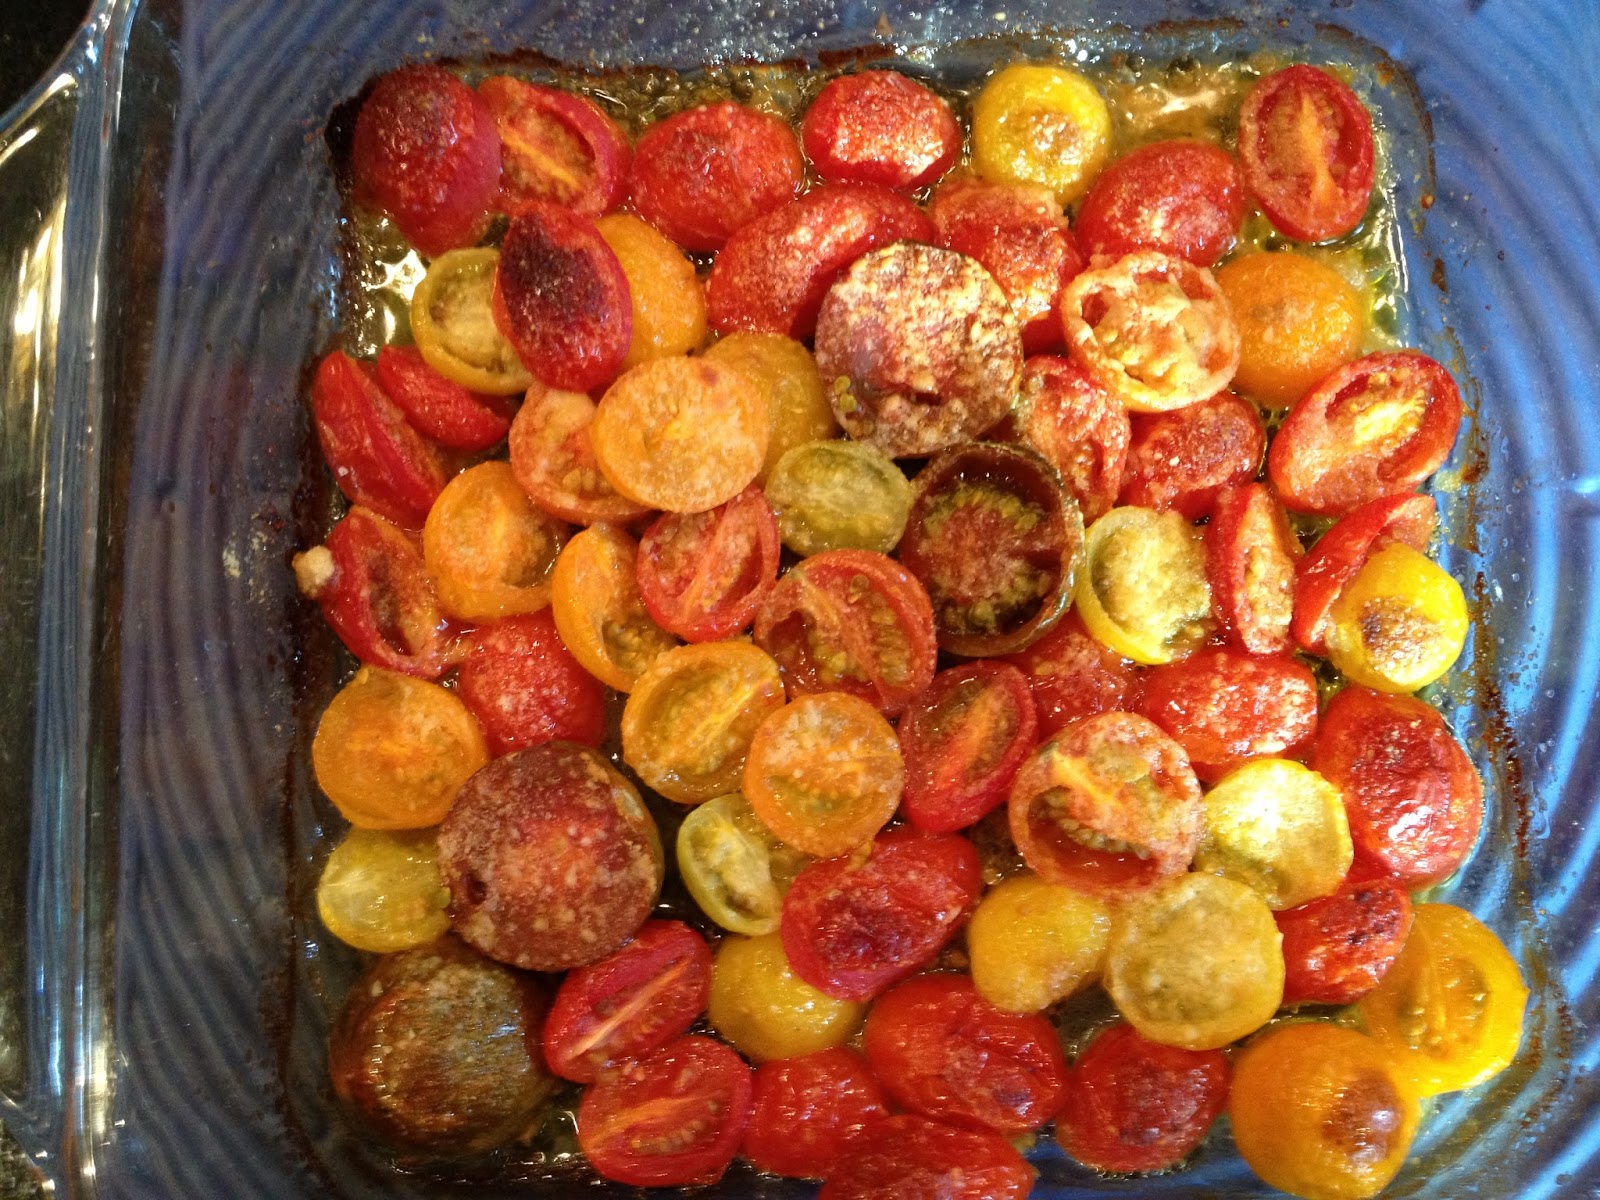
After the chicken was cooking away I also cut up a variety grape and cherry heiloom tomatoes.  I put them into a square baking pan with some olive oil.  The tomatoes were mixed up in the oilive oil then I sprinkled them with garlic power, salt, and grated parmasan cheese. 
Tomatoes ready for the oven
The tomatoes were put into the oven next to the Dutch Oven for the last 30 minutes of cooking to roast.  They turn out so sweet and flavorful you just have to try them even if you do not like tomatoes as a rule.
Roasted Tomatoes - So Yummy!

Don't forget to follow me on Facebook and Pinterest.

Shared with:
Let's get real Blog Hop

Friday, June 7, 2013

Chive Vinegar

Usually there are so many things to tend to in the garden this time of year. But it has been so cool and rainy everything is sluggish. And it snowed through the first week of May which significantly delayed planting our warm weather crops.  But everything is in the garden now.

The plants all look healthy if not a little small for the time of year.  However a few stalwarts refuse to be daunted by the weather.  Among them the chives.

My chives started with one little plant in a two inch pot I brought home as an impulse purchase. Now, some fourteen clumps later lining my lower garden bed, and countless plants given away, I can honestly declare my chives are thriving.
Chive Buds Ready To Pop
I love so many things about chives; their happy waving green stalks, the strong aroma when trimmed for cooking, the light onion taste they bring to raw vegetable dishes, and probably my favorite their beautiful flower.  Being part of the allium family, chives bear the telltale "globe of many flowers" bloom ranging from pink to purple to blue. 
Love This Color
I must admit that I love all alliums. We have a bed of ornamental alliums that are grown for their amazing blooms. We always grow three or four types of garlic, enough for a whole year of cooking plus some for next falls' seed garlic. And then there are the onions that I can't seem to do without.
 
One of my favorite projects is making chive vinegar.  For this project you will need:

A dry sterilized jar with lid (one quart mason jars work well)
3 - 3 1/2 cups white wine or rice vinegar
1 cup or more chive blossoms

Pick the chive blossoms in the morning after the dew has dried but before the heat of the day has caused their essential oils to evaporate. 

Gently swish the blossoms in cold water until free of debris. 
Getting a Cool Rinse 
Allow blossoms to dry; you can let them air dry or use a salad spinner.
Drying on a Towel
Pack the blossoms into the sterilized jar then fill the jar with your choice of vinegar. 
Fill the Jar
I prefer to use a good  white wine vinegar or a rice wine vinegar.  Remember the better the vinegar the better the end product.  Don't use apple cider vinegar because the darker color of the vinegar will mask the beautiful pink the chive blossoms produce. Also apple cider vinegar has its own very strong flavor that overpowers the more delicate chive flavor.
Close the jar and let set for 4 - 6 weeks in a dark place.  Shake the vinegar in the jar every couple of days during this time.  Once the vinegar is to your liking you can choose to leave the blossoms in or strain them out.  The best choice is to strain out the old blossoms then add a few new blossoms to the finished product.  However, given the time frame in which chives bloom,  fresh blossoms may not be available.
After 6 days.  Don't you love the color!
Note, if you have a metal lid for your jar, the vinegar may react with the lid making a mess and generally unusable product (don't ask me how I know).  Put a layer of plastic wrap between the jar opening and the lid to prevent the vinegar and metal lid from reacting.  Also label and date your jar.  It is very easy to forget what you made and when you made it after several weeks (again, don't ask me how I know). 

There are many other herbal vinegar worth having as well.  These all make great salad dressings, vegetable and/or meat marinades, additions to soups (especially when a soup just needs something), or a great sprinkle over bruschetta.

Try basil and garlic in white wine vinegar, or dill, chive and peppercorn in red wine vinegar.  The basic recipe is the same, just the herbs have been changed to protect the innocent, I mean to add some variety to your pantry. 

Don't forget to follow me on Facebook and Pinterest.

Shared with:
Homestead Barn HopMore the Merrier MondayClever Chicks Blog HopTuesdays with a TwistDown Home Blog HopWildcrafting WednesdayHome and Garden ThursdayFrom the Farm BloghopFreedom FridaysThursdays at the Homestead

Tuesday, June 4, 2013

Homemade Lip Balm

This is a project I have always wanted to try.  From everything I have read it is pretty easy. And the best part is, I get to control what goes into the lip balm. Say goodbye to petroleum based ingredients. Goodbye to synthetic dyes. Goodbye to parabens and other preservatives.

Say hello to all kinds of goodness: beeswax, coconut oil, almond oil, essential oils and maybe even honey.
Lip balm ingredients
There are so many recipes available that before I chose one I decided to do a little investigating into the basic structure or chemical make up of lip balm to find out the propose of each ingredient.

The basic structure of lip balm comes from a waxy solid. In commercial products this may come from petroleum, various types of wax, or polyethylene. In my home made recipe I will use beeswax in combination with coconut oil which is solid at room temperature.

Commercial products also contain a combination of conditioners, humectants, and emollients which are basically things to soften and moisten your lips. These ingredients also soften the product since the waxy bases tend to be very hard at room temperature. Pretty much all of the commercial ingredients are things I cannot spell so I won't try to write them out here. For my homemade recipe I will use almond oil and the coconut oil for this purpose.  You could use Shea butter and or cacao butter as well. If you were adventurous you could try palm oil too.

Finally commercial lip balms contain flavorings, fragrance and preservatives.  My homemade recipe will use essential oils for for the fragrance.  The ingredients themselves provide the flavoring although honey can be added for sweetness.  Both coconut oil and honey will provide some preservative function to lip balm.

The recipe I chose to try is:

4 tsp coconut oil
3 tsp almond oil
3 tsp beeswax
6 - 10 drops essential oil

This recipe made about 2 oz. of lip balm. The beeswax and two oils were put into a double boiler to melt.
Beeswax, Coconut Oil, and Almond Oil
Stir a bit as the ingredients melt together.
Yes my double boiler is wayyyyy bigger than needed for this project
Once soft, mix together well then add the essential oil.  I chose to try grapefruit oil.

Pour the melted mixture into your container of choice.  I used half-ounce metal tins.  But there are lots of other options. 
Ready for the refrigerator (but they will harden on their own without it)
Let cool in the refrigerator and in a few minutes, TADA!  
Lip Balm Ready to use

Now to just figure out how to make cute little labels for the tins. 

Don't forget to follow me on Facebook and Pinterest.

lip balm blogs badge

This post was shared with: Homestead Barn HopSunny Simple MondaysClever Chicks Blog HopTuesdays with a Twist Tuesdays Tea PartyFrugally SustainableWildcrafting WednesdayDown Home Blog HopHome and Garden ThursdayFrom the Farm BloghopFreedom FridaysThursdays at the Homestead


Monday, June 3, 2013

Rain Barrels

Look at what my hubby installed over the weekend!

Rain Barrels behind corn sprouts and next to the peas
These two rain barrels have been sitting unsold at our local HD for almost two years, taking up valuable space.  My hubby knows the store manager and asked him if we could buy them on the cheap.  We paid less than two for the price of one.  Our city sells rain barrels for a short time each spring.  We even paid less than the subsidized city price and these look much better than then ones the city sells.

Together they can collect 170 gallons of water.  Given the cost of water in our fair city, the rain barrels should pay for themselves in just one summer. 

Now we just need some rain!
Related Posts Plugin for WordPress, Blogger...