Showing posts with label DIY. Show all posts

Sunday, December 29, 2013

Paper Flowers for Cards, Scrapbooks, Decor and More

Look what I made. These paper flowers are so simple and pretty.
You will need card stock, glue, water in a spray bottle, and a way to cut out paper flower shapes in two or three different sizes.  I used my Silhouette but paper punches, or good old fashioned scissors will work just fine.

I created flower shapes on my Silhouette.  I made two different 5 petal flowers, a 6 petal flower and an 8 petal flower.  Each of the different paper flower cut outs gave a slightly different end result.  Click Here for the link to my Google Drive for the templates I made in both pdf and studio format.

The difference between the end results were mostly negligible between the 5 and 6 petal cut outs.  The 8 petal cut out creates a much fuller flower.  The big three color purple flower pictured above was made with three sizes of the 8 petal flower cut outs. 
For the blue flowers I cut a 5 petal flower out of three different colors.  The dark blue is a 3 inch cut out, the middle blue is a 2 inch cut out, and the smallest is a 1 inch cut out.

Spray each cut out lightly with water then scrunch the cut outs.  You want to start by holding the center and forcing the petals up to the middle  and then scrunching them together.


Let them dry, or mostly dry.  Then carefully open them back up.


Then using craft glue you put the layers together.  I used three of each sized cut out.  I found the craft glue works better than glue dots because you can twist the cut outs around to give you the best petal layers.  With glue dots, once affixed, you cannot move the layers to a better position.
In this picture the yellow flower on the left was made from 5 petal cut outs. The yellow at the bottom of the picture was made from 6 petal cut outs.  The large purple flower was made with the 8 petal cut outs.

These flowers will work beautifully on homemade cards and scrapbook pages.  My daughter wants to hang them from mono-filament from the ceiling in her room.  That would be very spring like in these bleak winter days. These would also look great on a door wreath.
Please follow me on FacebookPinterest, and Bloglovin.

Featured on:


Shared with:
Shared With Marvelous Mondays; Motivation Monday; More the Merrier Monday; Craft O Manic Monday Link Party; This Momma's Meandering Mondays; A Return To Loveliness; Inspire Me Tuesday; The Scoop; Take a Look Tuesday; Pincentive Blog Hop; Tuesdays with a Twist; Do Tell Tuesday; Too Cute Tuesday; Share It Link Party; Homemaking Link Up; Whatever Goes Wednesday; Inspire me Wednesday; Your Whims WednesdayWow Me Wednesday; Create It Thursday; Wildly Original Link Party; Pin It Thursday; Thursday Favorite Things Blog Hop; Catch a Glimpse Thursday; Frugal Days Sustainable Ways; Homeacre Hop; Grace at Home; Home and Garden Thursday; Sweet and Simple Friday; The Weekly Creative; Craft Frenzy Friday; Blog Strut Owl Style; Friday Link Party; Fresh Cut Friday; What to Do Weekends; Lovely Crafty Weekend; From the Farm Blog Hop; Farm Girl Friday; Serenity Saturday; Tickled Pink Times Two; Snickerdoodle Sunday

Monday, December 2, 2013

All Natural Coconut Oil Bath Fizzies

This is a project I have wanted to try for a long time.  Bath Fizzies.  Ok most people call them bath bombs but, aside from the alliteration, I am not a fan of that name so Bath Fizzies it is.

I think maybe it is the chemist in me to which these little gems have appealed.  This project harkens back to the ole' school science fair baking soda and vinegar volcanos.  In fact, that is exactly why these fizz when put into water; baking soda and acid, in this case citric acid rather than vinegar.  We use the citric acid instead of vinegar because citric acid is a solid at room temperature and vinegar is a liquid. Citric acid easily dissolves in water (like salt and sugar) and has about the same pH as most vinegars.  Citric acid is found in citrus fruit (oranges, lemons, limes, etc.).

When you drop these fizzies in water, instead of a volcanic explosion, you get cool fizzing, skin softening oil and salts, and yummy aroma therapy all from a little bath fizzie! 
 What you will need for this project is the following:

1 cup baking soda
1/2 cup citric acid (I ordered mine online but you may be able to find it in a well stocked canning supply section in a grocery store)
1/2 cup corn starch
1/2 cup mineral salts (I used real salt, the same stuff I cook with, kosher or sea salt works too, or you can leave the salt out)
2 Tbls coconut oil (you could use 2.5 tsp almond, olive, or other light liquid oil instead)
3-5 drops essential oil (I used lavender)
A spray bottle of water
Food coloring.  To keep this as safe and natural as possible I used 2 tsp dried beet root power but you could uses any food coloring with which you feel comfortable (you will only need 3-4 drops of liquid coloring)

You will also need a mixing bowl, some sort of mold to press the mixture into; I used a mini-muffin pan but there are many interesting mold shapes you can use.  You will also need either a fork or a pastry knife (see wire thing in picture above).

This recipe gave me 13 mini-muffin sized bath fizzies.
First put all the powered ingredients into a mixing bowl.  Since my colorant is a power it went in to the mix at this stage rather than with the wet ingredients.  Mix this well.  It is very dusty so you may want to use a mask or a handkerchief over your mouth and nose to keep from breathing in the baking soda and corn starch (not particularly harmful but uncomfortable and salty!)

See how the beet root made a really lovely light pink!  Once the dried goods are mixed cut in the coconut oil like you would cut in butter in a pie crust recipe.  Use the pastry knife (pictured below) or a fork to cut the coconut oil into the dried mix. Keep smooshing away until it looks like damp sand and all the coconut oil is incorporated.
When squeezed, this is how the mix holds together.
Lightly spray the mix with the water bottle then quickly stir the moisture into the mix.  Remember that when you put water on the mix it will start to fizz.  Our goal is to minimize the fizzing while getting the mix damp enough to mold.  Once dry, it should hold its shape.  Without the moisture added, the bath fizzies just crumble.  You will need to spray the mix with water then quickly mix it in several times.  You will be adding about 2 tsp of water, give or take, depending upon how humid or dry it is in your home. 

If you are using a liquid oil and liquid food coloring, instead of cutting the oil into the mix you will mix the oil, water, and food coloring together then sprinkle it on the mix a tiny bit at a time, combining it all together well before adding the next bit, repeating until it is all incorporated. 
Once it is all mixed together press the mixture into your mold.  Again I used a mini-muffin pan but there are a lot of very cool molds available.  I just didn't happen to have one handy (nor did I want to buy one).  Let the bath fizzies sit in the mold until dry to the touch.  In my very dry (and cold) climate, that took only a few minutes.  After drying, remove the bath fizzies from the mold and let sit out longer to dry further.
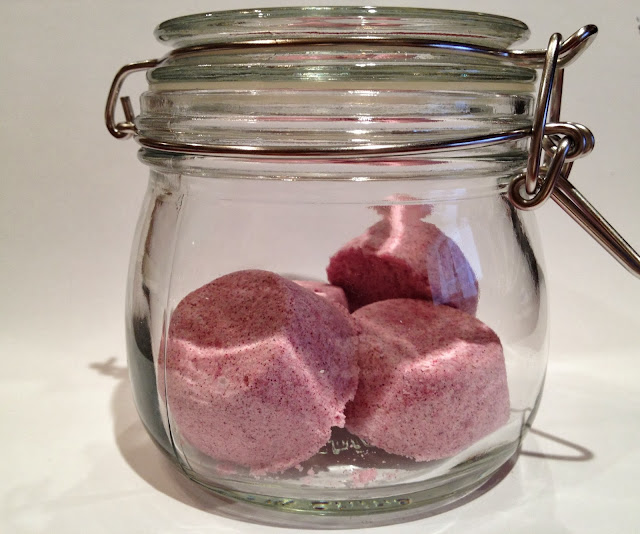
Once completely dry you are good to go.  These will be going out as Christmas presents.  Drop one or two in a warm bath and watch them go.  Because these used the beet root powder as the colorant, the bath water takes on a pretty pale pink which completely washes away (in other words it does not stain the bathtub).
These are for me.  Now I need to make a few more batches!


Don't forget to follow me on Facebook and Pinterest.

Epic Mommy AdventuresBack to the BasicsFriday-with-Friends-570x313
Shared with:
Creative Home and Garden Hop; My Favorite Posts Show Off Weekend Blog Party; Inspiration Monday; Clever Chicks Blog Hop; Amaze Me Monday; Motivation Monday; More the Merrier Monday; Momma's Meandering Mondays; Snickerdoodle Sunday; Homestead Barn Hop; A Return To Loveliness; The Scoop; Turn it up Tuesday; Do Tell Tuesday: Pincentive Blog Hop: Show Me What You Got; Tuesdays with a Twist; Wonderful Wednesday; Fall into Fall; Homemaking Link Up; Wow Us Wednesday; Whatever Goes Wednesday; Home and Garden Thursday; Treasure Hunt Thursday; Create It Thursday; Thursday Favorite Things; Frugal Days, Sustainable Ways; Sweet and Simple Fridays; Homeacre Hop; Grace at Home; Craft Frenzy Friday; Blog Strut Blog Hop; What to Do Weekends; The Merriest Blog Hop; From the Farm Blog Hop; Farmgirl Friday; My Favorite Posts Weekend Show Off Party; Wildly Original Link Party; Monday FundayBlock Party; Your Whims WednesdayWinter Blues WednesdayWildly Original Link PartyFridays with Friends

Sunday, December 1, 2013

Christmas Garlands - Sweets and Stockings

So I have developed a "thing" for paper garlands this year.  After I made the circle and tree garlands I made these extremely cute gingerbread men.
This is made from a free cut file I downloaded from svgcuts.com.  The gingerbread man svg cut file can be downloaded here.  All the shapes where cut from my Silhouette and glued together.  Once assembled, I punched two small holes in each little guy's forehead and thread them onto a piece of dark green yarn.  Then I taped the strand up on my fireplace.  Having threaded the gingerbread men I was able to move them around on the yarn once hung to space them (more or less) evenly.

It was going so well.  But once I got the little guys up on the fireplace and they looked so lonely.  They needed friends.  Or in other words; they were a good start but the large fireplace mantel needed more.
 
 So this is what I did. It makes me happy looking at it!
  
First I cut out some red candy canes.  Then I painted the white stripes on the candy canes with my daughter's craft paints.  Who needs fancy and expensive!  Next I added some black emphasis marks with a thin point sharpie.  The candy canes looked good but I wanted to add some green to the garland so I cut out some bows with my Silhouette from the bow files that came with my Silhouette.
Once the candy canes were completed I used a simple needle and sewing thread to string them together. Then taped them to the top of my fireplace mantel. 
The gingerbread mean and candy canes were looking good together but a third garland was needed to really complete the look.  And since I had stumbled into a Christmas sweets theme, I chose to add a strand of peppermint candies.  Ok maybe peppermint are not exactly Christmas, but the color and theme was correct. I downloaded the peppermint candy cut files for free from www.wecanbeaoriginal.com here.
So here is the finished fireplace in our lower level. 
But that got me looking over the fireplace upstairs with that lonely Christmas tree garland.  It too needed more.  This is an even bigger fire place! (You can tell from these pictures that we have since done the rest of the Christmas decorating).My first step was to cut out these super cute Christmas stockings using several different Christmas papers.  Then I again used a needle and thread to string them together. The stockings were the Silhouette Store's free shape of the week last week.
Working with the rule of threes I decided the third garland on this fireplace would be a sleigh and reindeer.  Aren't these just adorable?  The sleigh is a free Silhouette file I downloaded from www.birdcards.com here.  The reindeer cut file I downloaded from SVG Shop for free here. The bows are from the bow collection that came with my Silhouette. 
I made two sets of a sleigh with eight reindeer.  My daughter wanted the lead reindeer to be Rudolph. I should have made nine reindeer for each set but Rudolph was an after thought.  Perhaps Rudolph is filling in for Prancer or Comet. 
Here is the finished mantel. 
Now I need to start shopping! Don't forget to follow me on Facebook and Pinterest.

Shared with:

Friday, November 29, 2013

K-Cup Advent Calendar


So I saw this neat tutorial by Vicki over at Making Our Sustainable Life on making an Advent Calendar out of used (but cleaned) K-Cups and a shirt box.  If you don't know, K-Cups are those coffee pods used in the Keurig coffee makers.  And if you have a Keurig coffee maker you have a lot of used K-Cups; which I do, which is why Vicki's post caught my attention. So I decided to try to make this Advent Calendar myself.  This isn't as thorough a tutorial here since Vicki did such a nice job but here goes.

You will need:
1 shirt box
24 K-Cups
Hot glue gun
Something to cut holes in the shirt box top (I used an x-acto knife)
Wrapping paper pre-cut to the correct size to wrap the shirt box
Small trinkets to fill the 24 K-Cups
Numbers 1- 24 (I cut mine out on my Silhouette but stickers or markers work too)
Ribbon or other decoration you want to put on the wrapped box.

First I cleaned out my K-Cups.  No photos.  What a mess.  Just be prepared for coffee grounds everywhere.  Do this over the sink. 

Next I marked out circles on the top of a shirt box.  My shirt box was 9.5" X 14".  Try to space out four rows of six circles evenly.  You want a circle that is the same measurement as the inside diameter of the K-Cup.  This will make the cups fit snugly in the box top.  I found the circles in my box where about 3/8" apart.  Once all the circles are drawn on the top of the shirt box cut them out.  I used an x-acto knife to cut out my circles.
In these two photos you can see the top of the box, above, with some of the circles cut out and the K-Cups in place.  Below are the same cups from the other side.  I placed my K-Cups in the circles as each circle was cut.  This help stabilized the box lid while I was cutting.
 It took awhile to cut out all those circles.  Below is the top of the shirt box filled with K-Cups.
 Next each K-Cup needs to be hot glued in place.  I glued each K-Cup in four placed like spot welding.
Once all the K-Cups were glued in place, I flipped the box lid over and put the shirt box lid on the shirt box bottom then hot glued the top and bottom together. The K-Cups are slightly taller than the box so once the top and bottom of the box were glued together the cups were held snuggly.

Next I filled all the cups with chocolate coins and small trinkets.  Anything that fits will work. 
Next I put hot glue around each and every K-Cup on the top of the shirt box making sure to not get any inside the cups.  I needed to work fast on this step so there is no photo.  The purpose of the hot glue is to affix the wrapping paper to the top of the shirt box. My daughter will be poking her finger through the wrapping paper into a K-Cup each night of Advent.  I do not want her to be able to see into the other cups or have the trinkets shift around out of the K-Cups.  So glue all around each cup to keep everything in place.  Before the glue dries, press your piece of precut wrapping paper down into the glue on the top of the shirt box.  Make sure it adheres around each cup.

The last step is to finish wrapping the box and number the cups.  Again, each evening my daughter will push her finger through a number to get the surprise inside.  Once the box is wrapped, you can feel the circles the K-Cups make through the wraping paper so you can tell where to put the numbers.

Don't forget to follow me on Facebook and Pinterest.

Merry Christmas!

Epic Mommy Adventures
Shared with:
Creative Home and Garden Hop; Inspiration Monday Party; Clever Chicks Blog Hop; Motivation Monday; More the Merrier Monday; Homestead Barn Hop; What to Do Weekends; All Things Christmas Link Party; The Scoop; Turn it up Tuesday; Tuesday with a Twist; PINcentive Blog Hop; Wonderful Wednesday; Fall Into Fall; Wow Us Wednesday; Homemaking Link Up; Wildcrafting Wednesday; Treasure Hunt Thursday; Home and Garden Thursday; The Homeacre Hop; Thursday Favorite Things; Sweet and Simple Friday; Grace at Home; Create It Thursday; TGIF Link Party; Blog Strut Owl Style; What to do Weekends; The Merriest Blog Hop; Christmas Categorically Crafting; Holiday Glam Link Party; Farm Girl Friday; From the Farm Blog Hop

Saturday, November 23, 2013

Christmas Garland - Circles and Trees

It is time to start decorating for Christmas.  Usually this waits until the day before or after Thanksgiving.  But with Thanksgiving a week later than usual this year, I think my timing is spot on.

I have already made some Paper Christmas Wreaths that you can see here.  Now it is time for garland.   
First I cut out circles and sewed them together on my sewing machine.  I cut four different greens, four different reds, and one white.  Of course I cut the circles on my Silhouette but these can easily be done by hand or with a punch.  My circles are 2.5 inches in diameter.  At this size I could get 12 circles from one 8.5" x 11" piece of paper.  I used card stock because it holds up better to sewing. 
I arranged the colors in a regular alternating pattern then ran them through the sewing machine using a large stich length.  I used regular thread, with a cranberry color on top and a white in the bobbin.I strung the finished garland at my top stair rail behind the couch.  This is a very long garland which would be good on a tree.  With all these circles I could easily cut it into two or three shorter garlands to use elsewhere.  I think this garland is very festive.
I also cut out Christmas trees to sew together.  I used two different greens.  The trees are 5" height.  I used a dark green top thread and again a white bobbin thread.  To get the spacing I first stitched through the tree then stopped the sewing and pulled the treads (careful to not put pressure on the stitches just sewn into the tree, lest the paper tear) to the back of the sewing machine about 6" or so.  I did not set up a stand to make an accurate measure between trees.  Instead I just eye-balled it.  If the tree garland was for a very formally decorated room, I would have been more precise with the spacing. 

Both of these garlands took only a few minutes to sew together.  The cutting takes the most amount of time.  But a paper cutting machine or some shaped punches the cutting can go quickly.  The beauty of this type of garland is that just about any shape will do.

Don't forget to follow me on Facebook and Pinterest.

Shared with:
Clever Chicks Blog HopInspiration MondayCreative Home and Garden Hop; Motivation Monday; Pin It Monday; Homestead Barn Hop; This Momma's Meandering Mondays; More the Merrier Monday; All things Christmas Link Party; Inspire Me TuesdayTuesdays with a Twist; Fall into Fall; Wonderful Wednesday; Wow us Wednesday; Thursday Favorite Things; Homemaking Link Up; Treasure Hunt Thursday; Sweet and Simple Friday; Create It Thursday; Home and Garden Thursday; Thankful Homeacre Hop; Better Living Together; The Merriest Blog Hop; From the Farm Blog Hop
Related Posts Plugin for WordPress, Blogger...